What type of lighting connection in the towed vehicle should I use?
Q: When I make the lighting installation in my tow vehicle, should I use a dedicated bulb and socket type or a diode kit?
 A: Most towed vehicles allow the installation of a separate bulb in a socket powered by the RV in each taillight of the towed vehicle. As LED lighting and clear taillight lenses with colored covers over the bulbs become more prevalent, diodes will be required. Most towing system manufacturers make recommendations in conjunction with their work in designing the baseplate for a particular towed vehicle.
How to install the wiring:
In TechTweet #1, we recommended a six wire wiring kit. Installation of this kit is quite straight forward. Begin by mounting the connector on the supports supplied by the baseplate maker, using the self-tapping bolts to thread the holes in them. If supports are not located on the baseplate, then find a suitable accessible location in the center of the front fascia of the towed vehicle. The wiring will be installed after it is run through to the rear of the towed vehicle. Remove the connector and keep sufficient wire at the front of the vehicle.  Begin threading the flat four wire cable and any additional wires from this location up along the driver's side inner fender. Ensure that the wiring does not come in contact with any sharp edges or any hot or moving parts when going between the front of radiator area and the fender area. If the braking system requires connections to the tow vehicle wiring we recommend doing it in this fender area.
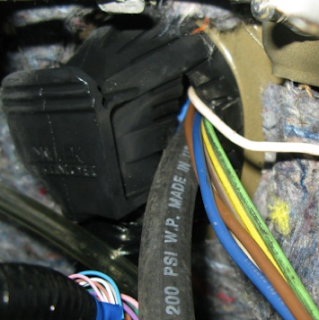
We also recommend making a tap onto the white (ground) wire and attaching the tapped wire to a suitable ground screw in this area. There usually is a large wiring grommet on the firewall on the driver's side through which the wiring can be passed into the passenger compartment. Use a box cutter type knife to cut a small hole in this large grommet.

Ensure that there is no obstruction on the passenger compartment side of the firewall. You may need to loosen some carpeting or under padding to completely access this grommet. Use a coat hanger that has been straightened out as a pulling tool and push an end through the slit in the grommet. Once visible in the passenger compartment make a small hook to pull the wiring through into the passenger compartment, loop the wire into this hook and crimp the hanger to retain the wire. If necessary use a small amount of electricians tape to cover the hook. Always insure that the coat hanger does not come into contact with the positive battery terminal or any other electrical contact while pulling the coat hangar through the firewall.
If the wiring is difficult to pull through and it is not caught on any obstruction, then spray a light coating of silicone on the wiring where it enters the grommet. Once the wire is pulled into the passenger compartment, lift the sill plates (the plastic panels that cover the carpet to metal body junction at the door opening) by placing you fingers under the panels and pulling straight up evenly across the length of the plate. They may be locked into the front kick panel or the door pillar. Once removed, the carpet can be rolled back, revealing a wiring track or raceway containing the vehicle wiring. Run the tow wiring in this same track, ensuring that it does not come into contact with any sharp metal edges or moveable parts of the seats or doors. Follow the track to the rear seat area and if necessary remove the lower seat cushion.
This usually involves pressing the lower cushion toward the rear of the vehicle and lifting. Sometimes it is merely lifted up out of nylon retainers. Occasionally it requires the removal of a bolt or two.These bolts will be metric fasteners. Once the wiring is into the rear compartment or trunk ensure that it is safely installed back to the rear taillight area.
If the taillights are to be removed, remove the metric fasteners and slide the assemblies away from the body usually in a rearward direction.
If a separate bulb is to be installed, then drill a 1" (25mm) hole in the housing in the location recommended by the tow system manufacturer. For example, Blue Ox shows the location in a photo in their baseplate installation instructions. These can be accessed online at www.blueox.us. Place the socket into the new hole and use a small amount of silicone sealer to ensure a water tight seal. Make the wiring connections to the bulb socket on the drivers side (yellow, brown and white wires) then take the wiring to the passenger side through the rear compartment. Remove the taillight housing as previously described and install the remaining bulb using the green, brown and white wiring.
Should your towed vehicle require the diode kit then you will need to determine the wiring color code for the taillight and brake wiring on the vehicle. You may need to use a test light to determine which wiring provides the brake and taillight function. Note: On vehicles that have amber signal and red brake lights, ensure that the connections are made to the red lights. The reason for this is that in some States it is illegal to use an amber light as a brake light. The diode kits usually contain three highly conductive diodes with two connections on one side and one connection on the other end. The single wire connection goes to the bulb. The double end has one end connected to the existing vehicle wiring that was cut and the other goes to the new RV wiring that is being installed. Follow the color coding mentioned earlier or the instructions supplied with the kit. A crimp-on junction connector will be required to be made to the taillight wiring to power the two rear taillights from the single brown wire from the RV.
Neatly install the wiring, and reinstall the two taillight housings and any panels that were removed for access to the wiring. Properly protect the new and existing wiring. Go back to the front of the vehicle and trim the wiring to fit into the wiring boot, the housing and the rear of the connector. The plastic connector has molded into the surface the wire codes: Y or LT is yellow; G or RT is green; BN or T/M is Brown; GND or WT is white; S is used for the brake system; and A is used for a charge wire. We recommend using Corrosion Block on each terminal and screw and then coating the connectors and wiring with di-electric grease as it will provide a physical barrier to moisture. Reinstall the connector into the housing and then cover the wire with the boot, then remount with the covering flap on the top.
Conclusion: It depends on the type of taillight housing is found in the tow vehicle. LED and clear lens taillights will require a diode kit. Most others will allow a separate Bulb and socket kit to be utilized
(click on pictures to see enlarged images)
---
Like what you've just read?
Tell your friends on facebook or twitter!


 A: Most towed vehicles allow the installation of a separate bulb in a socket powered by the RV in each taillight of the towed vehicle. As LED lighting and clear taillight lenses with colored covers over the bulbs become more prevalent, diodes will be required. Most towing system manufacturers make recommendations in conjunction with their work in designing the baseplate for a particular towed vehicle.
 Begin threading the flat four wire cable and any additional wires from this location up along the driver's side inner fender. Ensure that the wiring does not come in contact with any sharp edges or any hot or moving parts when going between the front of radiator area and the fender area. If the braking system requires connections to the tow vehicle wiring we recommend doing it in this fender area.


